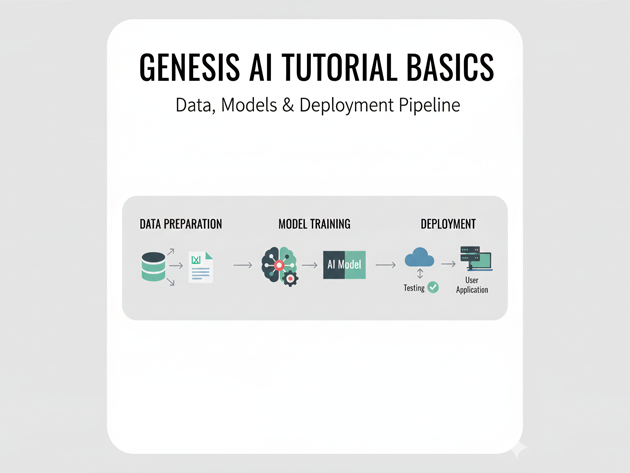
Genesis AI Platform Basics Tutorial for Developers
This Genesis AI platform basics tutorial focuses on building an end-to-end generative AI platform using components you already know: Node.js or Python backends, vector search, relational or NoSQL storage and CI/CD. Instead of assuming a specific SaaS product called “Genesis AI”, we use the term to describe a foundation you can extend with providers like OpenAI, Claude, or self-hosted models.
In this Genesis AI tutorial you will:
- Understand the core building blocks of a modern generative AI platform
- Design a simple “Genesis AI” service boundary for your stack
- Call LLMs from a backend service with clear prompts
- Add retrieval-augmented generation (RAG) with a vector index
- Wire everything into existing observability and CI/CD pipelines
To connect this Genesis AI platform basics tutorial to the rest of your stack, pair it with:
Node.js backend basics tutorial,
Python data engineering tutorial,
MongoDB basics tutorial,
SQL basics tutorial,
CI/CD pipeline tutorial,
Git version control tutorial,
and the cloud integration guides such as
Kubernetes basics tutorial
and
Azure cloud basics tutorial.
1. Genesis AI platform basics: the high-level architecture
At a high level, a “Genesis AI” platform is a thin layer that standardizes how your applications talk to generative models. A typical architecture looks like this:
- Clients: React frontends, mobile apps, CLIs
- Genesis AI service: a backend that handles prompts, calls LLM providers, and enforces safety rules
- Model providers: OpenAI, Claude, or self-hosted models
- Knowledge stores: SQL, MongoDB or other databases described in your stack posts
- Vector index: for retrieval-augmented generation (RAG)
- Observability: logs, metrics and traces (Grafana/Prometheus, etc.)
The rest of this Genesis AI platform basics tutorial will implement a minimal version of that Genesis AI service in Node.js, plus a companion Python example.
2. Define a Genesis AI service boundary
Instead of letting every microservice call LLM providers directly, this Genesis AI platform basics tutorial recommends centralizing calls behind a dedicated API like /api/genesis/chat. That gives you a single place to handle:
- Authentication and rate limiting
- Prompt templates and system messages
- Logging of inputs/outputs (with redaction)
- Routing between multiple model providers
2.1 Minimal Genesis AI service in Node.js
Start with an Express-based service boundary:
mkdir genesis-ai-service
cd genesis-ai-service

npm init -y
npm install express openai dotenv
Create .env:
OPENAI_API_KEY=sk-your-key
GENESIS_ALLOWED_ORIGIN=http://localhost:5173
Then implement src/server.mjs:
import "dotenv/config";
import express from "express";
import OpenAI from "openai";

const app = express();
const port = process.env.PORT || 4000;
const client = new OpenAI({ apiKey: process.env.OPENAI_API_KEY });

app.use(express.json());

app.use((req, res, next) => {
  const origin = req.headers.origin;
  const allowed = process.env.GENESIS_ALLOWED_ORIGIN;
  if (origin && allowed && origin === allowed) {
    res.setHeader("Access-Control-Allow-Origin", origin);
  }
  res.setHeader("Access-Control-Allow-Headers", "Content-Type, Authorization");
  res.setHeader("Access-Control-Allow-Methods", "POST, OPTIONS");
  if (req.method === "OPTIONS") return res.sendStatus(204);
  next();
});

// Genesis AI chat endpoint
app.post("/api/genesis/chat", async (req, res) => {
  const { userId, message } = req.body || {};

  if (!message || typeof message !== "string") {
    return res.status(400).json({ error: "message is required" });
  }

  try {
    const response = await client.chat.completions.create({
      model: "gpt-4.1-mini",
      temperature: 0.3,
      max_tokens: 400,
      messages: [
        {
          role: "system",
          content:
            "You are the Genesis AI platform assistant. " +
            "Explain concepts clearly and return concise answers.",
        },
        {
          role: "user",
          content: message,
        },
      ],
    });

    const answer = response.choices[0]?.message?.content ?? "";
    // TODO: log prompt/response pair for analytics
    res.json({ answer });
  } catch (err) {
    console.error("Genesis AI service error", err);
    res.status(502).json({ error: "Upstream model provider error" });
  }
});

app.listen(port, () => {
  console.log(`Genesis AI platform basics tutorial service on http://localhost:${port}`);
});
This core Genesis AI service gives you a single place to experiment with prompt templates and routing strategies without changing client code.
3. Add a Python utility client
Many teams have Python-heavy analytics or ETL stacks. This Genesis AI platform basics tutorial adds a small Python helper that calls the Genesis AI service, so Python code does not need direct credentials for external LLMs.
3.1 Python client snippet
pip install requestsimport requests
GENESIS_URL = "http://localhost:4000/api/genesis/chat"
def ask_genesis(message: str, user_id: str | None = None) -> str:
payload = {"message": message}
if user_id:
payload["userId"] = user_id
resp = requests.post(GENESIS_URL, json=payload, timeout=30)
resp.raise_for_status()
return resp.json().get("answer", "")
if __name__ == "__main__":
reply = ask_genesis("Summarize what a CI/CD pipeline does in 3 bullets.")
print(reply)Now Python notebooks or ETL jobs can call ask_genesis() and treat the Genesis AI platform as a shared capability.
4. Genesis AI platform basics: retrieval-augmented generation
To make answers more grounded in your own data, a Genesis AI platform usually adds a vector index for RAG (retrieval-augmented generation). The Genesis AI service:
- Embeds user questions and content into vectors
- Retrieves the most relevant documents
- Feeds those documents along with the question into the model
4.1 Simple RAG flow with a vector store
Assume you have a separate process that has already:
- Loaded documentation from your systems (e.g., Adobe Commerce, Odoo, Kafka)
- Generated embeddings and stored them in a vector index (PostgreSQL + pgvector, MongoDB, or a dedicated vector DB)
Inside the Genesis AI service you can add a rough sketch for the RAG step:
async function answerWithRag({ question }) {
  // 1) Embed the question
  const embeddingResponse = await client.embeddings.create({
    model: "text-embedding-3-small",
    input: question,
  });
  const embedding = embeddingResponse.data[0].embedding;

  // 2) Query your vector index (pseudo-code)
  const topDocs = await findSimilarDocumentsInVectorStore(embedding, {
    k: 5,
  });

  const contextText = topDocs
    .map((doc) => `Source: ${doc.source}\n${doc.content}`)
    .join("\n\n---\n\n");

  // 3) Ask the model using the retrieved context
  const response = await client.chat.completions.create({
    model: "gpt-4.1-mini",
    temperature: 0.2,
    max_tokens: 500,
    messages: [
      {
        role: "system",
        content:
          "You are the Genesis AI platform answering based only on the supplied context. " +
          "If something is not covered, say you do not know.",
      },
      {
        role: "user",
        content: `Context:\n${contextText}\n\nQuestion: ${question}`,
      },
    ],
  });

  return response.choices[0]?.message?.content ?? "";
}
This pattern is at the heart of many Genesis AI-style internal copilots.
5. Observability and CI/CD for Genesis AI
Because the Genesis AI platform is a central dependency, you should treat it like any other production service. This Genesis AI platform basics tutorial recommends:
- Logging prompt/response metadata (hashed user IDs, token counts, latency)
- Publishing metrics (requests per minute, error rates) to Prometheus or a similar system
- Adding the service to your existing
CI/CD pipeline
so tests run on every change - Using feature flags or config toggles to switch model providers safely
5.1 Simple logging middleware
Here is a lightweight logging middleware you can adapt:
function genesisRequestLogger(req, res, next) {
  const started = Date.now();
  const userId = req.body?.userId || "anon";

  res.on("finish", () => {
    const durationMs = Date.now() - started;
    console.log(
      JSON.stringify({
        type: "genesis_ai_request",
        path: req.path,
        status: res.statusCode,
        userIdHash: hashUserId(userId),
        durationMs,
      })
    );
  });

  next();
}

// Usage:
app.use(genesisRequestLogger);
Combine this with your existing logging stack so Genesis AI behavior is visible during incidents.
6. Compact Genesis AI platform basics cheat sheet
To wrap up this Genesis AI platform basics tutorial, here is a tiny cheat sheet summarizing the key decisions and components you will touch most often.
| Area | Examples | Purpose | Relative Impact |
|---|---|---|---|
| Service boundary | /api/genesis/chat |
Centralizes LLM calls and safety logic | |
| Prompt templates | System + user messages | Control tone, format and guardrails | |
| RAG layer | Vector index + embeddings | Ground answers in your own data | |
| Observability | Logs, metrics, traces | Debug behavior and track usage | |
| CI/CD | Tests + deploy pipeline | Keep Genesis AI changes safe and repeatable |
With these Genesis AI basics in place, you can treat generative AI as a first-class platform capability, not a scattered set of one-off scripts or UI hacks.