Adobe Commerce Magento 2 Tutorial for Developers
This Adobe Commerce Magento 2 tutorial walks through the core pieces you actually touch as a developer: installation, modules, layout XML, template overrides and product data. Instead of trying to cover every admin screen, we will stand up a local store, build a tiny custom module, override a template safely and read product data via the repository layer.
In this tutorial you will:
- Review the Adobe Commerce / Magento 2 architecture at a high level
- Install a local instance with Composer and the CLI
- Create a minimal
Jscriptz_Demomodule - Add a simple controller and view model-backed template
- Override a core template using layout XML instead of hacks
- Load product data with repositories and dependency injection
For deeper reference, keep the
official Adobe Commerce developer docs
open. You can also connect this Adobe Commerce Magento 2 tutorial to your
PHP backend basics tutorial,
SQL basics tutorial,
MariaDB tutorial for developers,
Linux basics for developers,
Git version control tutorial
and
CI/CD pipeline tutorial.
1. Adobe Commerce architecture in one paragraph
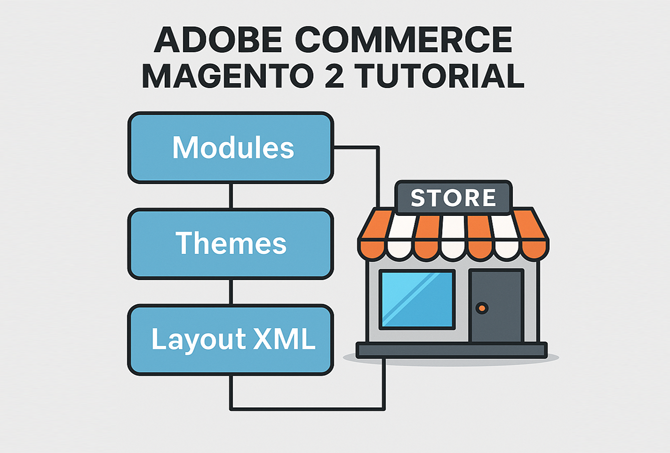
At a high level, Adobe Commerce (Magento 2) is a modular PHP application running on top of a LAMP-ish stack with Composer-managed dependencies, a service layer built on dependency injection, and a view layer made of layout XML, blocks and templates. Almost everything lives in modules that can be enabled, disabled, extended or replaced.
- Modules – units of functionality under
app/codeorvendor. - Themes – override view layer (templates, static assets).
- DI configuration –
di.xmldeclares preferences, virtual types and plugins. - Layout XML – declares which blocks and containers appear on which handles.
In the rest of this Adobe Commerce Magento 2 tutorial, we will touch each of these pieces in a small, safe way.
2. Install Adobe Commerce / Magento 2 locally with Composer
The standard way to bootstrap a Magento 2 project is with Composer. You will also use the bin/magento CLI heavily.
2.1 Create the project
Assuming you have PHP, Composer and a database ready:
# create project (community edition example)
composer create-project \
  magento/project-community-edition \
  magento2-dev \
  --repository-url=https://repo.magento.com/

cd magento2-dev
2.2 Run the installer
Prepare a blank database and then run:
bin/magento setup:install \
  --base-url="https://magento2-dev.local/" \
  --db-host="127.0.0.1" \
  --db-name="m2dev" \
  --db-user="m2user" \
  --db-password="m2pass" \
  --backend-frontname="admin" \
  --admin-firstname="Jason" \
  --admin-lastname="Lotzer" \
  --admin-email="admin@example.com" \
  --admin-user="admin" \
  --admin-password="Admin123!"
Once this completes, you should be able to log into the admin and view the default storefront. Make sure basic commands like bin/magento cache:status and bin/magento indexer:status run correctly.
3. Create a minimal Jscriptz_Demo module
Now this Adobe Commerce Magento 2 tutorial shifts to extension development. We will build a minimal module named Jscriptz_Demo that renders a simple page.
3.1 Module directory structure
Create directories under app/code:
mkdir -p app/code/Jscriptz/Demo/etc/frontend
mkdir -p app/code/Jscriptz/Demo/Controller/Index
mkdir -p app/code/Jscriptz/Demo/view/frontend/layout
mkdir -p app/code/Jscriptz/Demo/view/frontend/templates
3.2 registration.php and module.xml
app/code/Jscriptz/Demo/registration.php:
<?php
use Magento\Framework\Component\ComponentRegistrar;

ComponentRegistrar::register(
    ComponentRegistrar::MODULE,
    'Jscriptz_Demo',
    __DIR__
);app/code/Jscriptz/Demo/etc/module.xml:
<?xml version="1.0"?>
<config xmlns:xsi="http://www.w3.org/2001/XMLSchema-instance"
        xsi:noNamespaceSchemaLocation="urn:magento:framework:Module/etc/module.xsd">
    <module name="Jscriptz_Demo" setup_version="1.0.0">
        <sequence>
            <module name="Magento_Store"/>
        </sequence>
    </module>
</config>
Enable the module and clear generated code:
bin/magento module:enable Jscriptz_Demo
bin/magento setup:upgrade
bin/magento cache:flush
4. Add a controller, layout and template
To render a frontend page, you need a route, controller, layout handle and template. This is a core pattern in any Adobe Commerce Magento 2 tutorial.
4.1 Frontend routes configuration
app/code/Jscriptz/Demo/etc/frontend/routes.xml:
<?xml version="1.0"?>
<config xmlns:xsi="http://www.w3.org/2001/XMLSchema-instance"
        xsi:noNamespaceSchemaLocation="urn:magento:framework:App/etc/routes.xsd">
    <router id="standard">
        <route id="jscriptz_demo" frontName="jsdemo">
            <module name="Jscriptz_Demo"/>
        </route>
    </router>
</config>
4.2 Controller class
app/code/Jscriptz/Demo/Controller/Index/Index.php:
<?php
namespace Jscriptz\Demo\Controller\Index;

use Magento\Framework\App\Action\Action;
use Magento\Framework\App\Action\Context;
use Magento\Framework\View\Result\PageFactory;

class Index extends Action
{
    /** @var PageFactory */
    private $pageFactory;

    public function __construct(Context $context, PageFactory $pageFactory)
    {
        parent::__construct($context);
        $this->pageFactory = $pageFactory;
    }

    public function execute()
    {
        $page = $this->pageFactory->create();
        $page->getConfig()->getTitle()->set(__('Jscriptz Demo Page'));
        return $page;
    }
}
4.3 Layout XML and template
app/code/Jscriptz/Demo/view/frontend/layout/jscriptz_demo_index_index.xml:
<?xml version="1.0"?>
<page xmlns:xsi="http://www.w3.org/2001/XMLSchema-instance"
      xsi:noNamespaceSchemaLocation="urn:magento:framework:View/Layout/etc/page_configuration.xsd"
      layout="1column">
    <body>
        <referenceContainer name="content">
            <block class="Magento\Framework\View\Element\Template"
                   name="jscriptz.demo.block"
                   template="Jscriptz_Demo::demo.phtml" />
        </referenceContainer>
    </body>
</page>app/code/Jscriptz/Demo/view/frontend/templates/demo.phtml:
<div class="jscriptz-demo">
    <h1><?= $block->escapeHtml(__('Jscriptz Demo Module')) ?></h1>
    <p>This block is rendered by the Jscriptz_Demo module.</p>
</div>
After clearing caches, visit /jsdemo/index/index on the storefront to confirm the page renders.
5. Override a core template the safe way
Instead of editing core files under vendor/, use layout XML and theme overrides. This Adobe Commerce Magento 2 tutorial uses the product view page as an example.
5.1 Create a theme-level override
Suppose your custom theme is Jscriptz/default. To override
Magento_Catalog::product/view/addtocart.phtml, copy it to:
mkdir -p app/design/frontend/Jscriptz/default/Magento_Catalog/templates/product/view

cp vendor/magento/module-catalog/view/frontend/templates/product/view/addtocart.phtml \
   app/design/frontend/Jscriptz/default/Magento_Catalog/templates/product/view/addtocart.phtml
Clear caches and test. Your theme’s version now takes precedence, and future upgrades will not overwrite it.
6. Load product data via the repository layer
Working with product data is central to any Adobe Commerce Magento 2 tutorial. The recommended pattern is to use repositories and type-hinted interfaces, not raw SQL.
6.1 Example: load a product by SKU
In a view model, CLI script or block, you can inject ProductRepositoryInterface and call get by SKU.
<?php
use Magento\Catalog\Api\ProductRepositoryInterface;

class DemoProductLoader
{
    /** @var ProductRepositoryInterface */
    private $productRepository;

    public function __construct(ProductRepositoryInterface $productRepository)
    {
        $this->productRepository = $productRepository;
    }

    public function loadBySku(string $sku): \Magento\Catalog\Api\Data\ProductInterface
    {
        return $this->productRepository->get($sku);
    }
}
This pattern plays nicely with dependency injection, unit tests and plugins.
7. Useful CLI commands cheat sheet
Here is a compact CLI cheat sheet that pairs well with this Adobe Commerce Magento 2 tutorial. Add these to your notes or shell history:
| Command | Purpose | Run Frequency |
|---|---|---|
bin/magento cache:flush |
Clear all caches after code/layout changes | |
bin/magento setup:di:compile |
Compile DI and code generation for production builds | |
bin/magento indexer:reindex |
Refresh search and product indexers | |
bin/magento setup:upgrade |
Apply module schema and data patches |
Combined with Git, CI/CD and Linux skills, these commands let you build a solid deployment pipeline for Adobe Commerce.
By the end of this Adobe Commerce Magento 2 tutorial, you have created a module, rendered a custom page, overridden a template and accessed product data in a clean way. From here you can branch into more advanced topics like checkout customizations, GraphQL APIs, Hyvä or Luma theming, and performance tuning.